A few weeks ago I started to build my second handwired keyboard, the TBK Mini from BastardKB.
How I built it
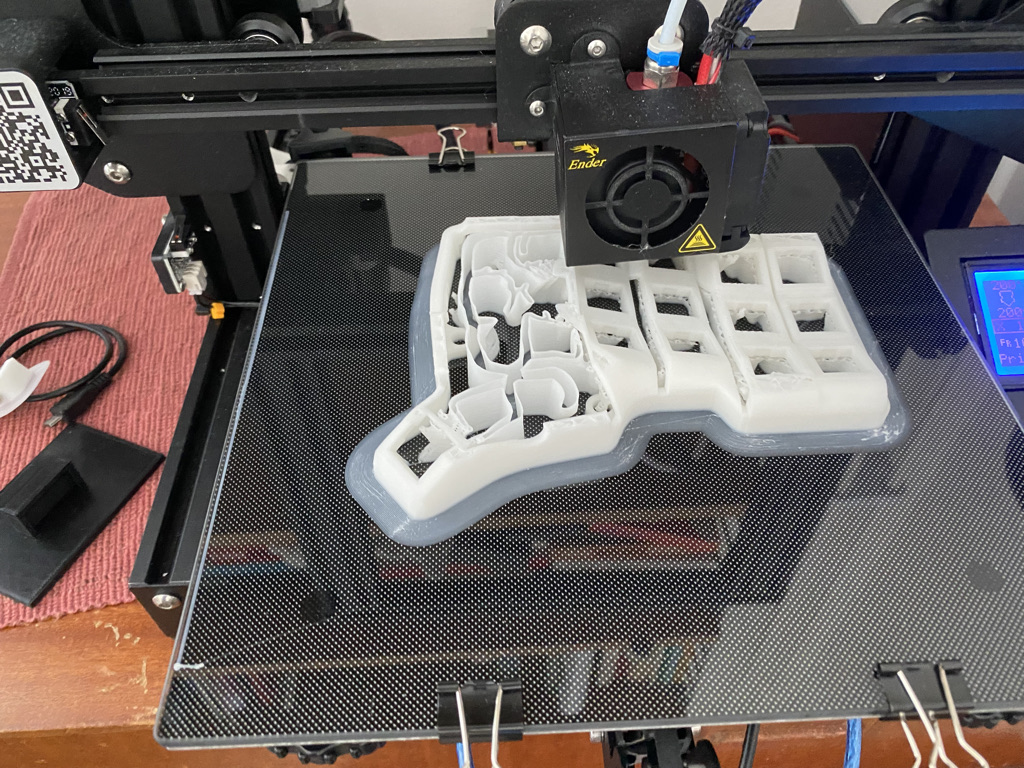
1. Printing the case
I started by printing the case on my Ender 3 printer. I sliced it using Ultimaker Cura with the following settings:
- Standard Quality - 0.2mm
- Build Plate Adhesion: Brim
- Supports: Tree supports
I used eSUN PLA+ White filament. Note that (at the time of writing) there are 2 different white eSUN PLA+ filaments: White (a tiny bit translucent) and Cold White.
I didn't think that I would like the tiny bit of translucency with the White but I think that it went really well with the design of the mini. I actually bought both filaments to compare.
Some very small customizations to the STL files
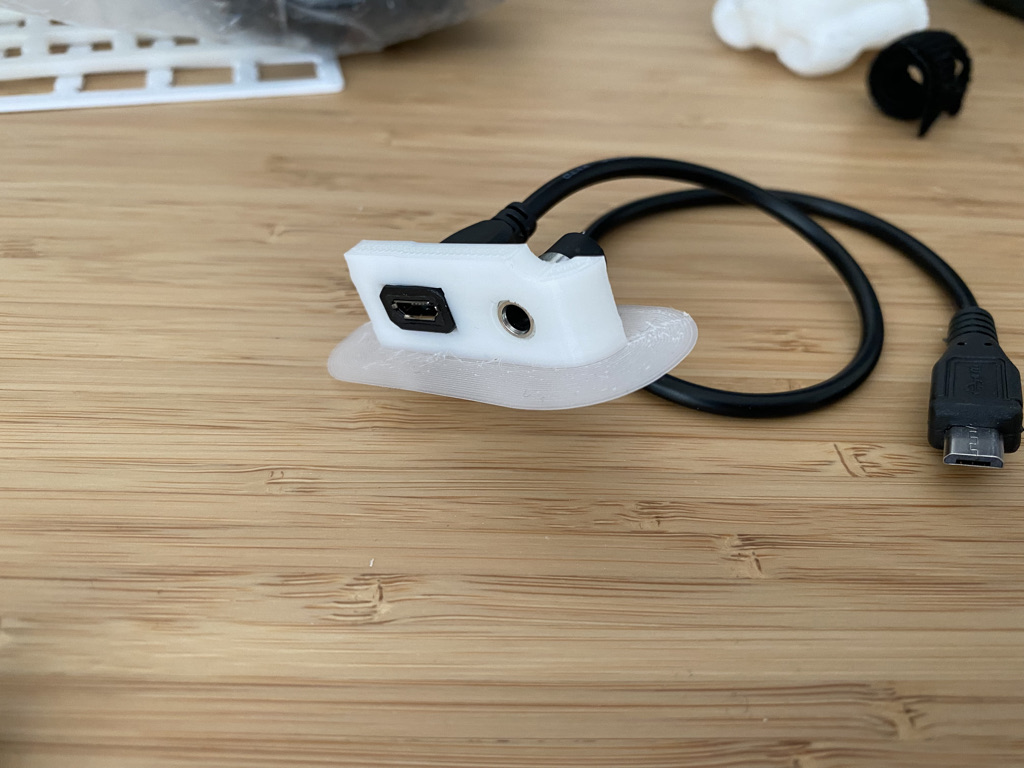
Since I wanted to us a socket mounted TRS cable and use a Pro Micro controller instead of an Elite-C I modified the case in tinkercad.
- I wanted to us a socket mounted TRS cable so I moved and changed the location of the TRS post
- Removed the screw-holes for the pcb-plate for the Elite-C. The reasoning is that I'm using a Pro Micro instead and I'm handwiring the build.
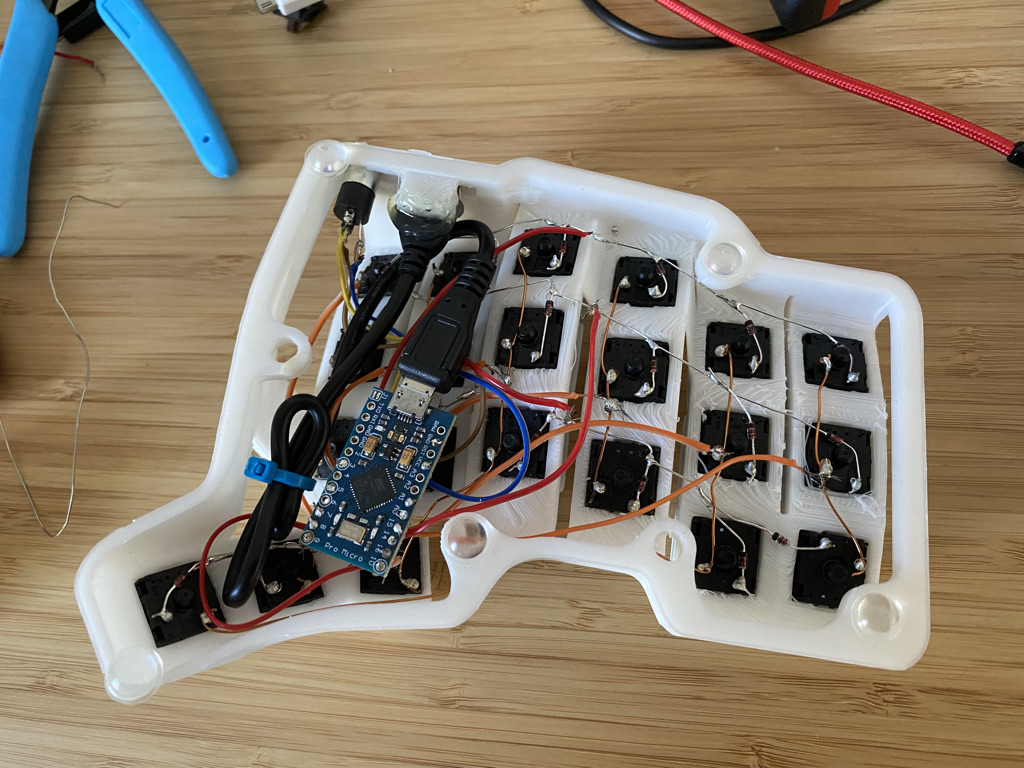
- The USB connectors on the Pro Micro are very weak so I planned on using a small micro USB extender inside of the case.
Test prints for the connector ports:
Printing the case:
The printed case with switches:
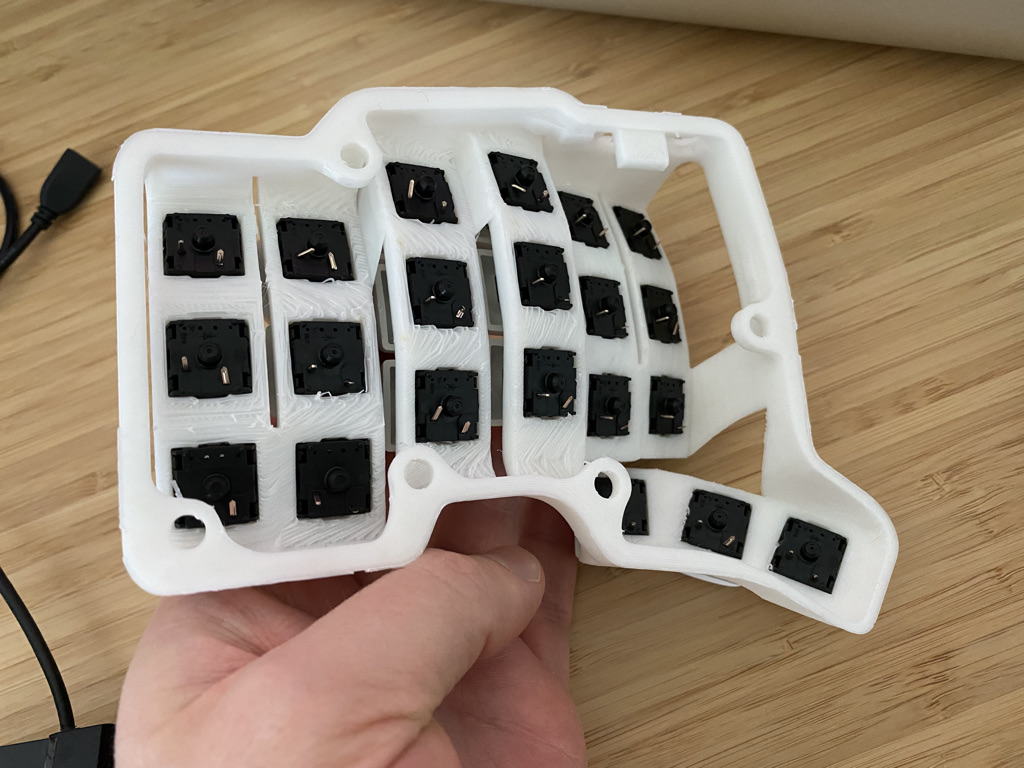
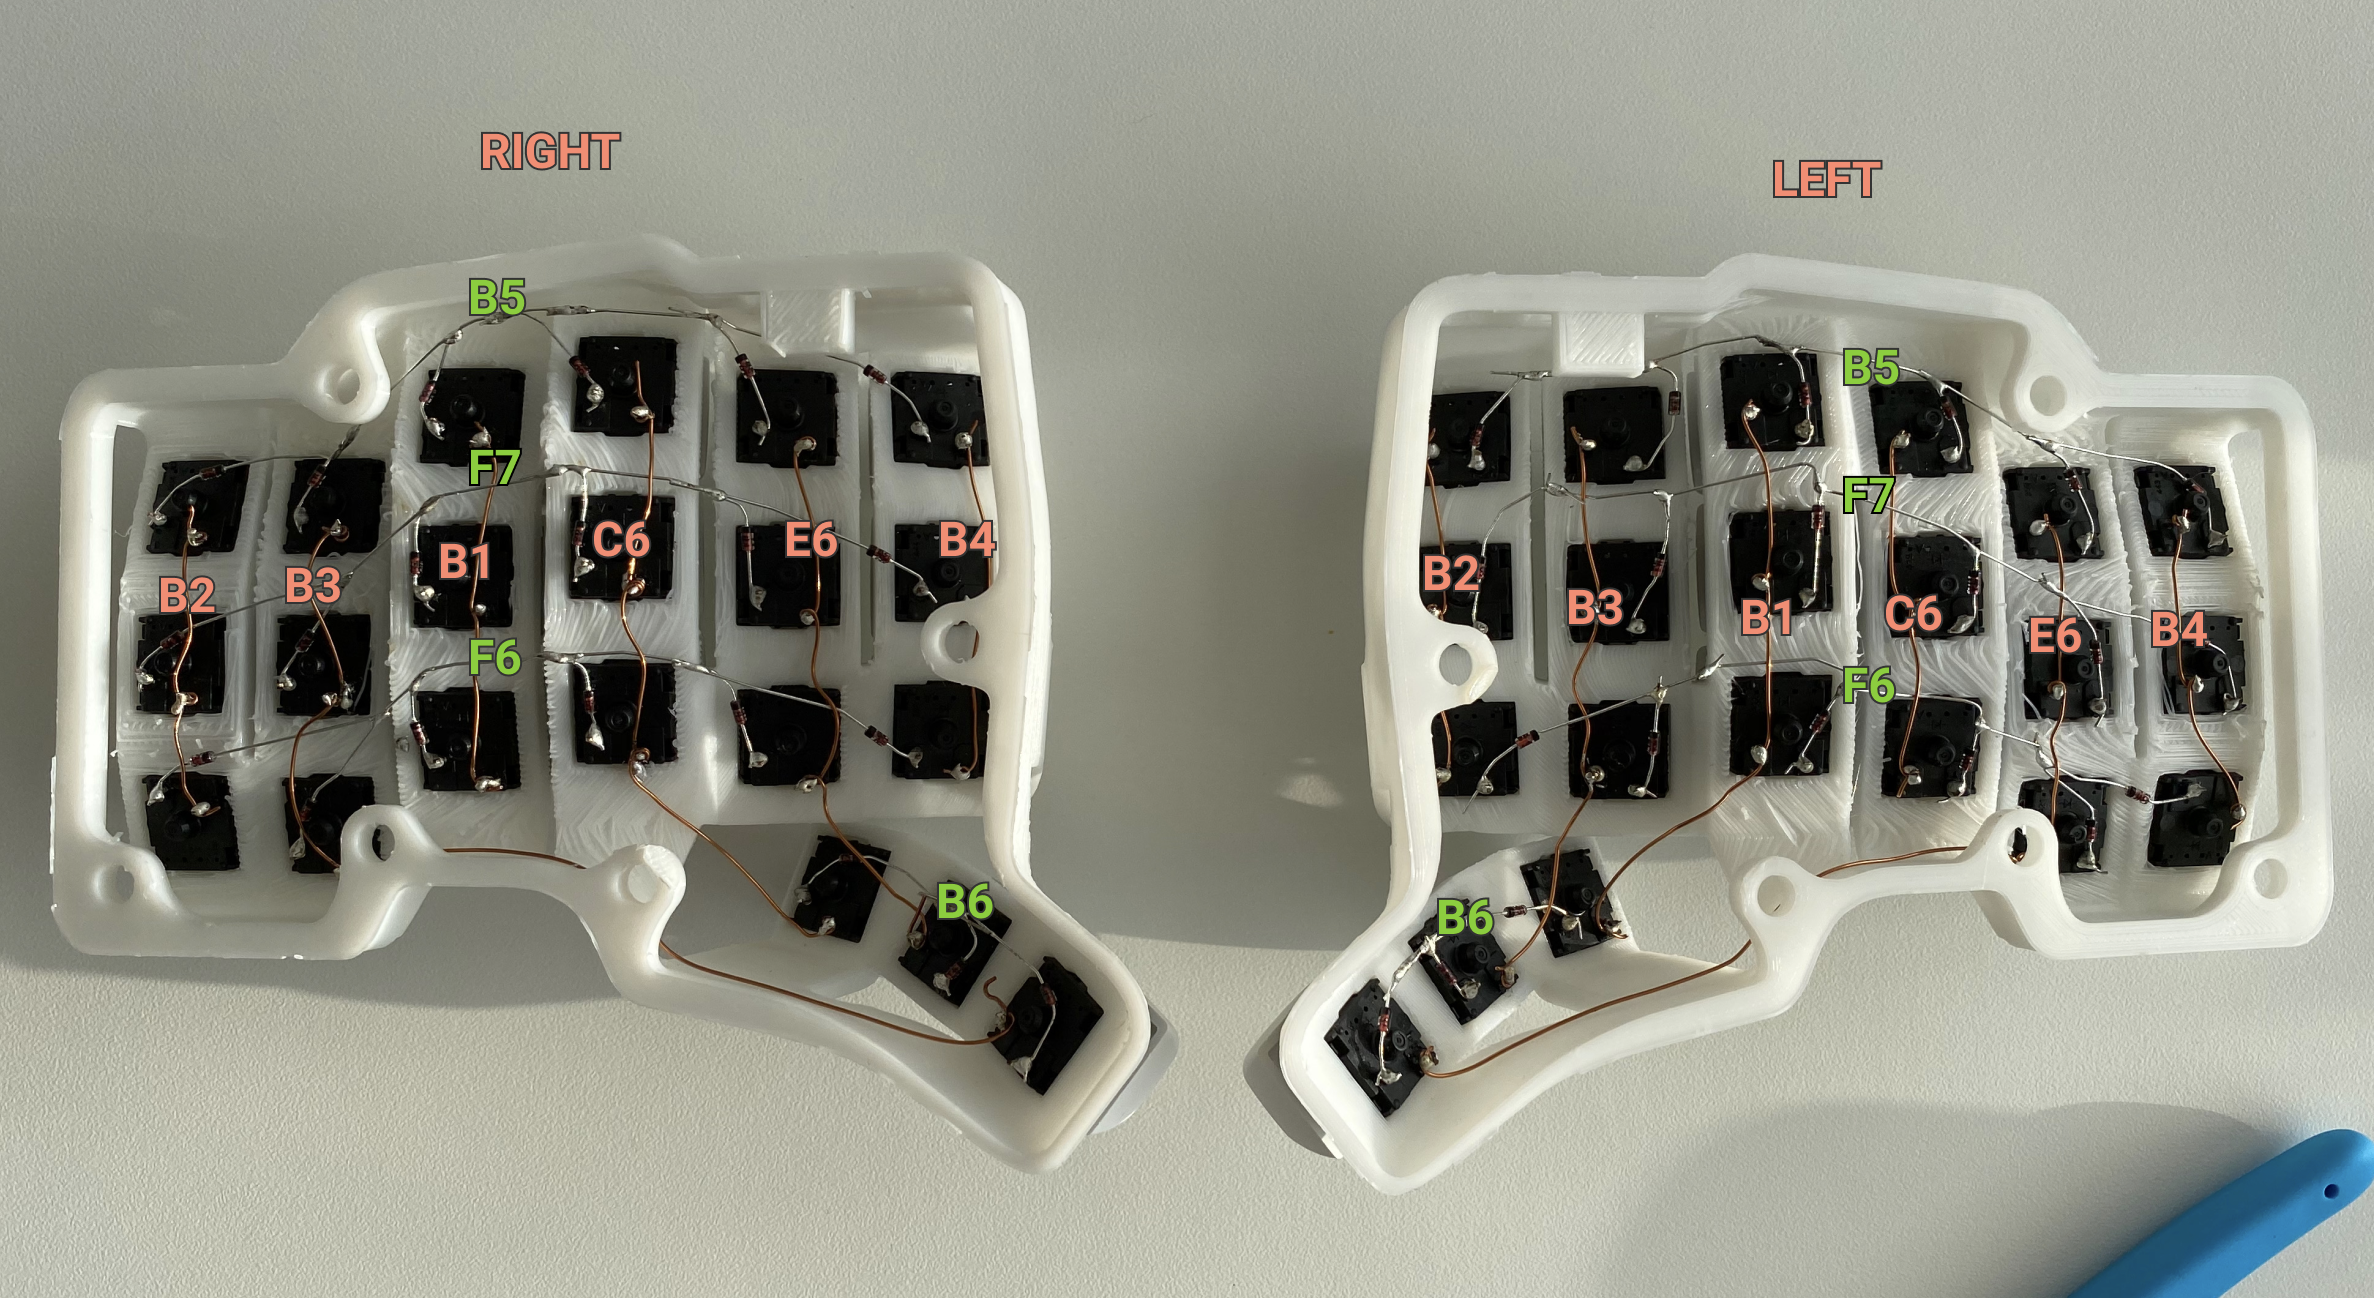
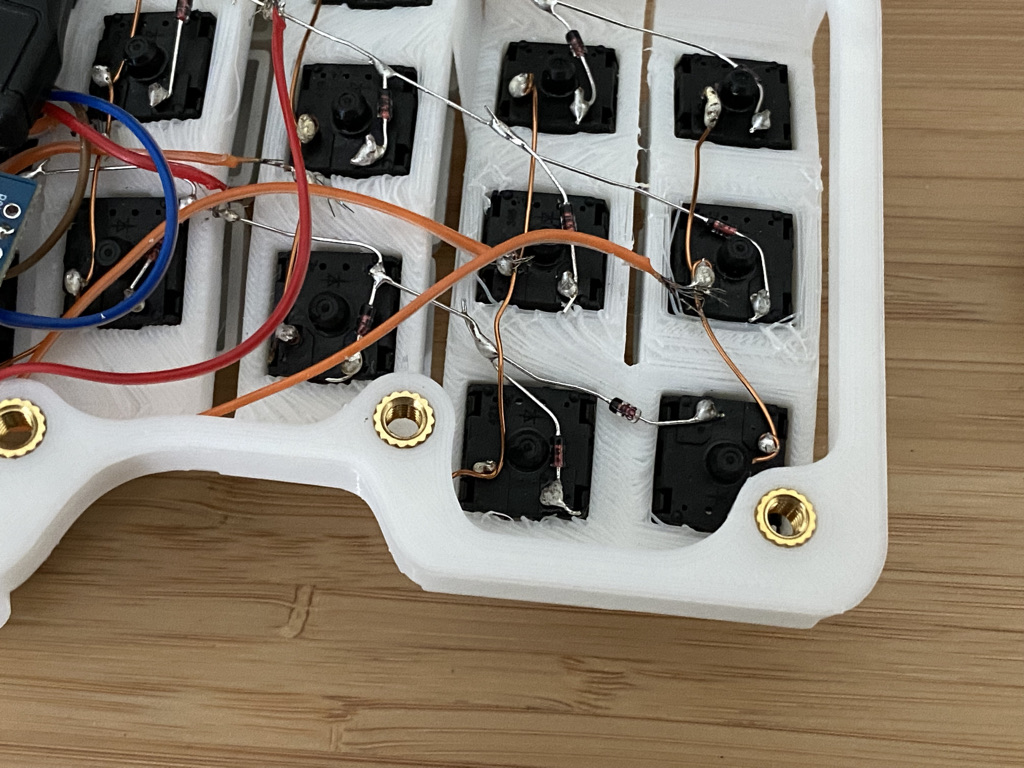
2. Wiring the key-switches
The TBK mini is available as a kit from bastardkb.com but since I'm changing the controller and not using the kit this is a custom build.
That being said I wanted to make as few changes to the firmware as possible from the official TBK mini qmk firmware.
My last build was a dactyl manuform so I wired the columns and rows as I did on that build.
I used magnet wire for the columns that allowed me to solder directly on it without having to strip it. The insulation burns off during soldering.
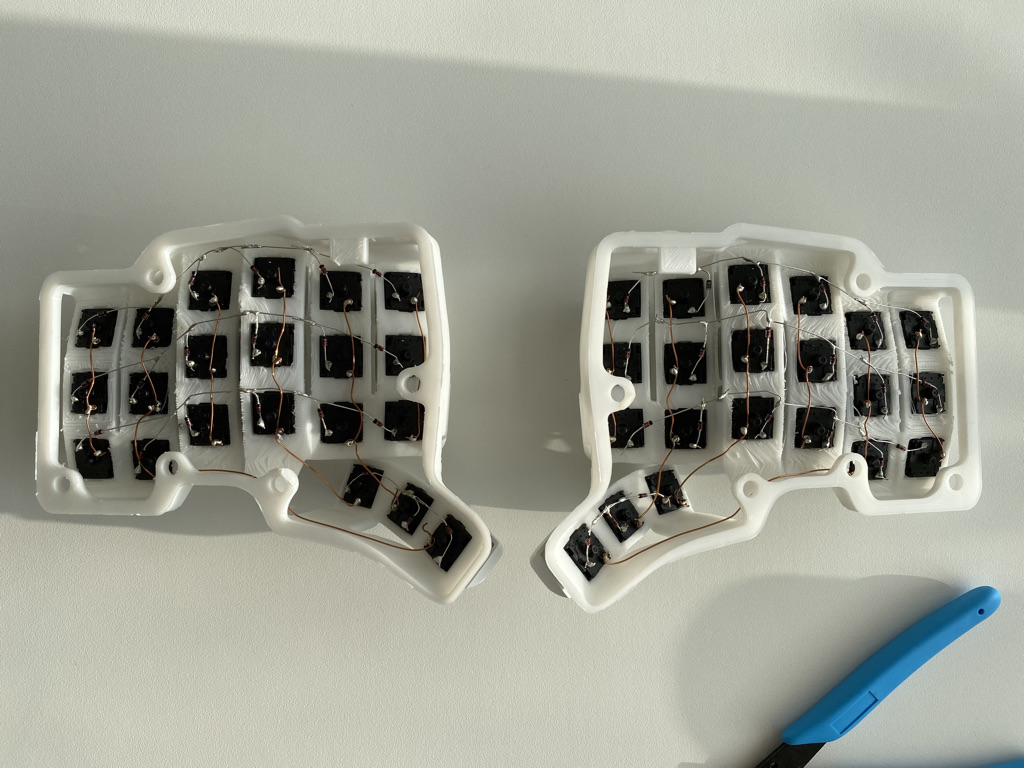
3. Wiring the Pro Micro controllers
I found a great pinout description of the Pro Micro on golem.hu.
I had gotten a few pointers in the bastardkb discord on how to wire the thumb clusters.
Looking at the stock firmware I made a quick sketch of the rows and columns in figma to have in front of me when I did the soldering on the controller.
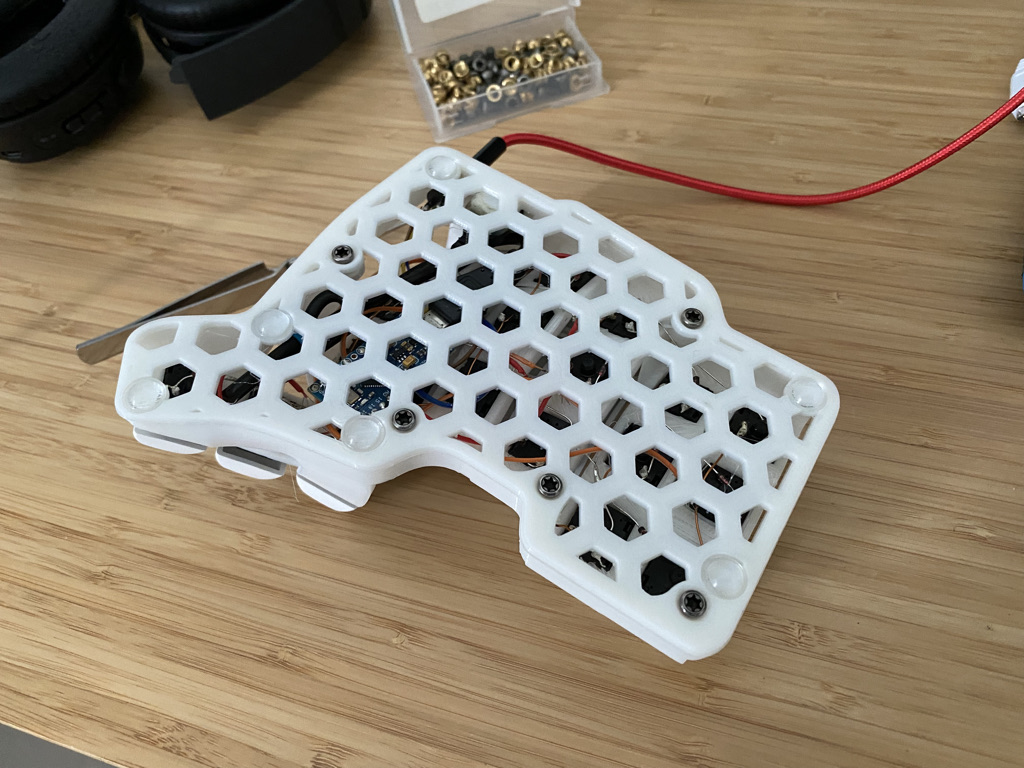
The finished sides with some temporary non-slip pads while waiting for the screw inserts from aliexpress.
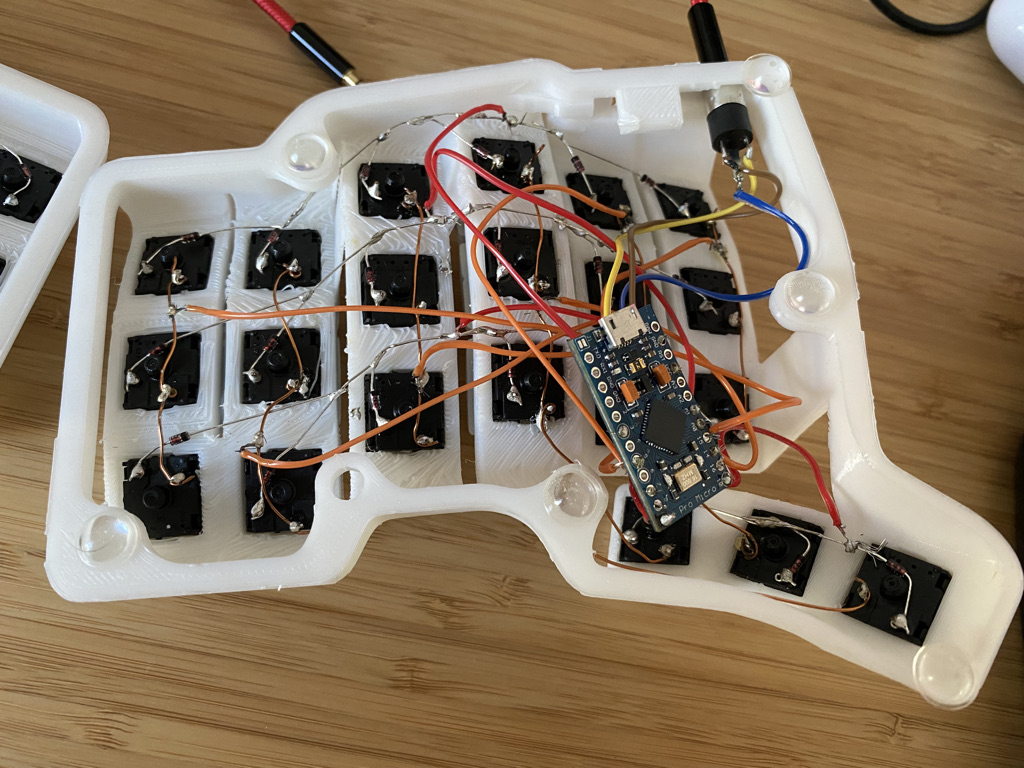
I only added the USB extention on the left side. It was super tight but it worked.
4. Setting up the firmware
I forked the official firmware and created my own int the keyboards/handwired/tbkmini directory.
I had a lot of issues building the firmware on my mac so I went with doing it in docker.
I used the following build command:
util/docker_build.sh handwired/tbkmini:default
Then I flash it on to the board with QMK toolkit. The first time I hade to short out the reset pin and ground to make the Pro Micro be able to flash. But then I used a RESET key on one of my layers instead.
My own (very Work-In-Progress) keymaps are called cfarvidson and akebanebashi which is my take on the miryoku layout.
5. Bottom plates
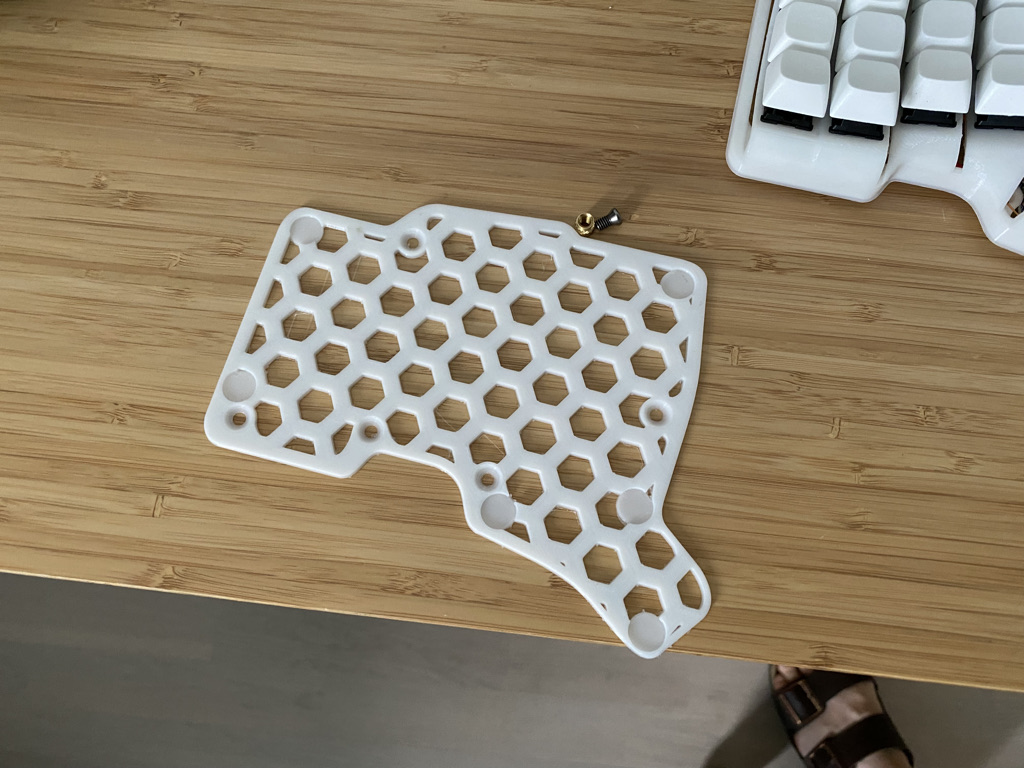
The inserts
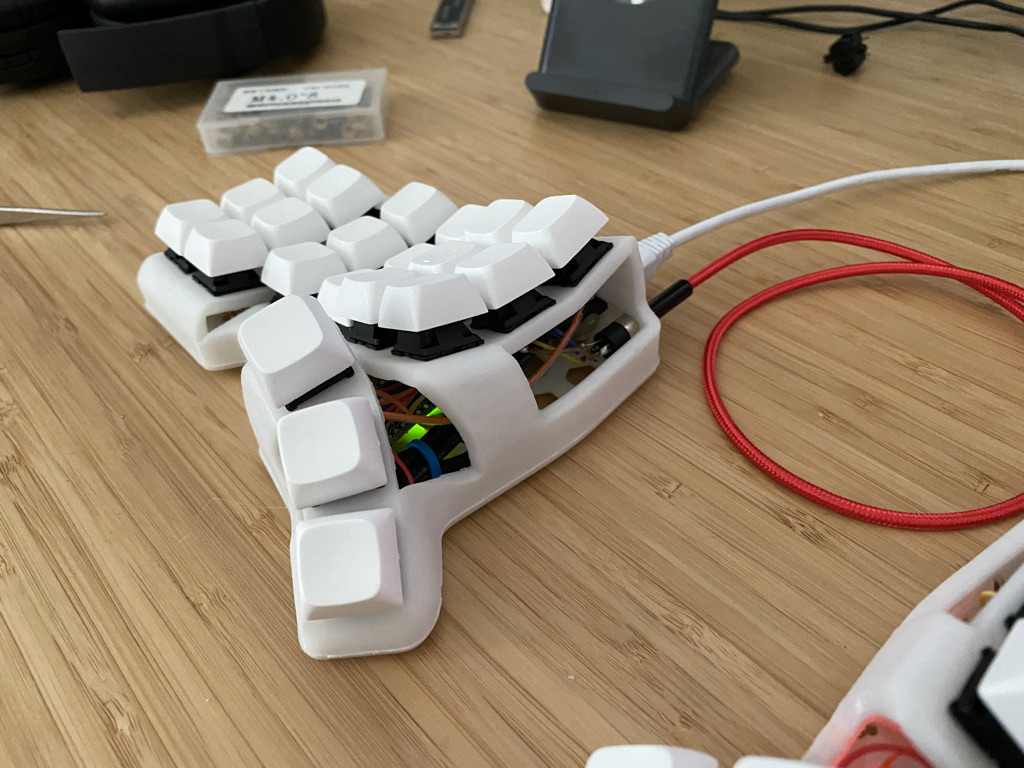
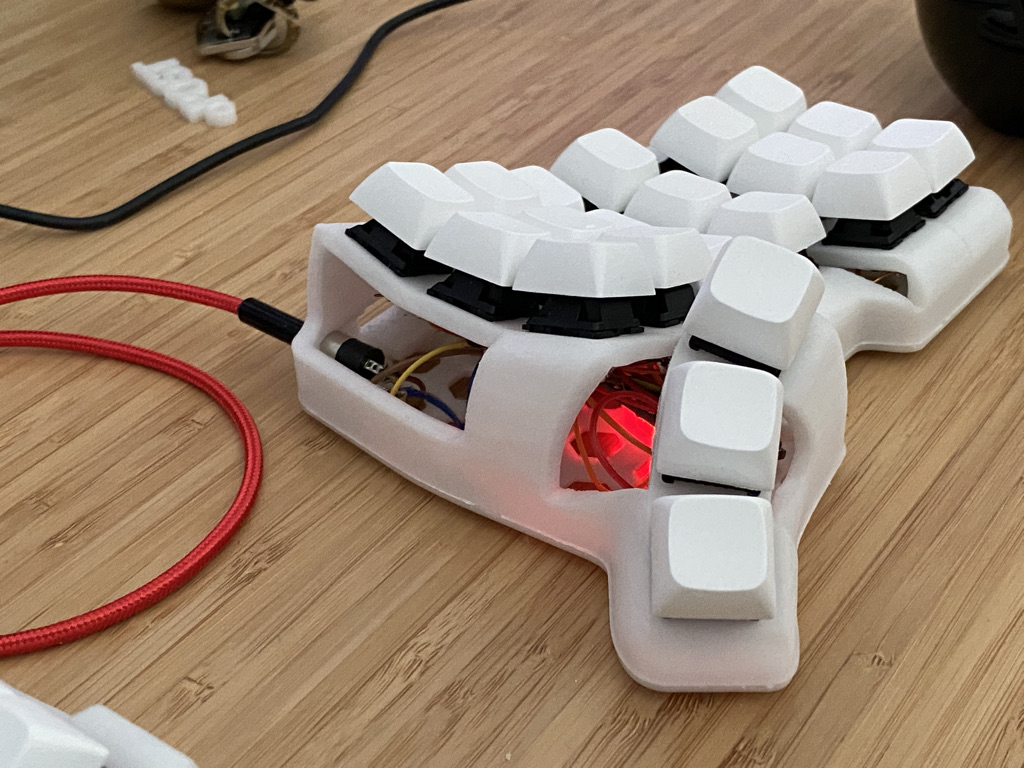
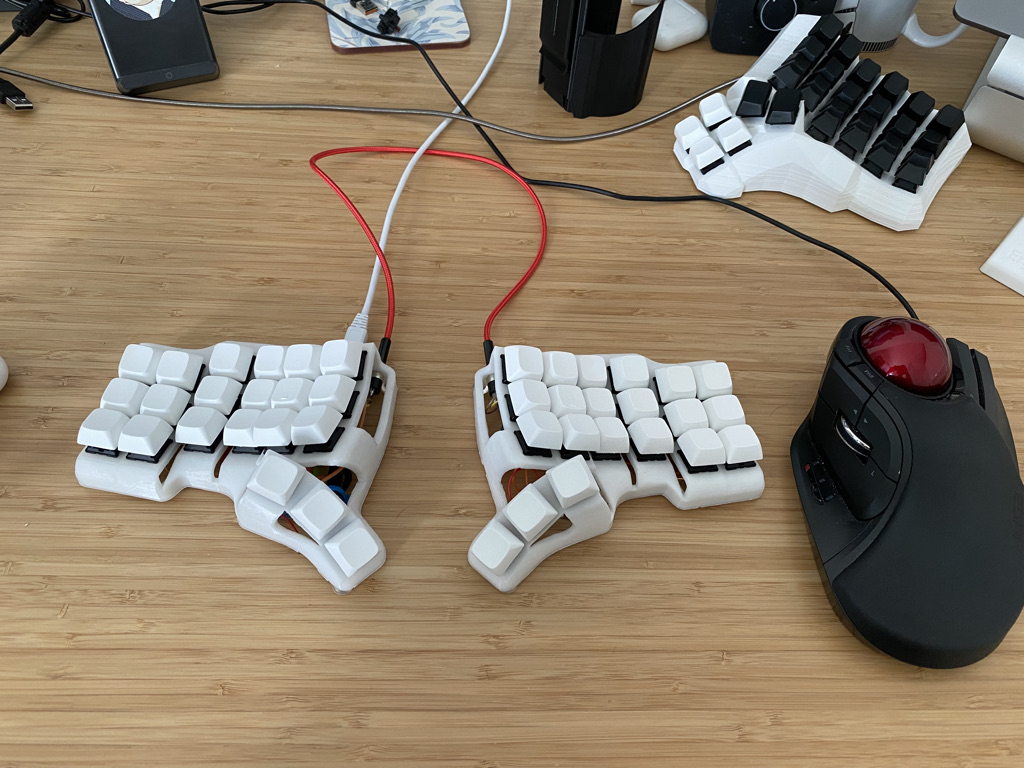
6. All done
I added white NP keycaps from keycapsss.
What would I do differently next time?
Not used the magnet wire
Using the magnet wire was a big mistake. I've had a lot of flaky connections and soldering it was kind of hard since the solder had a hard time to adhering until the insulation burned off.
I should have saved myself a lot of time just stripping the wire like I did on my last build.
I'm actually thinking of re-wiring the columns since I keep having intermittent problems that I think stems from the magnet wire.
Wired one side mirrored
When first tested the keyboard with firmware I noticed that the right side was printing letters in a mirrored/backwards order.
After a little digging I realized that the dactyl manuform and the TBL mini handles the two halves differently. The default mini firmware mirrors the two halves and but the dactyl manuform does not.
Hence I had to modify the layout to match my wiring.
If I were to build another one I would redo the wiring to match the default firmware.
Maybe go with an Elite-C instead
My reason for using the Pro Micro were based on a few minor facts. I had used the Pro Micro on my previous build and they are pretty cheap. I also planned on using the extender cable to protect the fragile USB connector.
But I think that the next time around I would opt to use Elite-C controllers instead. That would let me use the stock firmware and I believe that the connectors on the Elite-C is not as fragile as the one on the Pro Micro. And the price difference is not that big.